on Tue Aug 20 2019
| 15 min. read
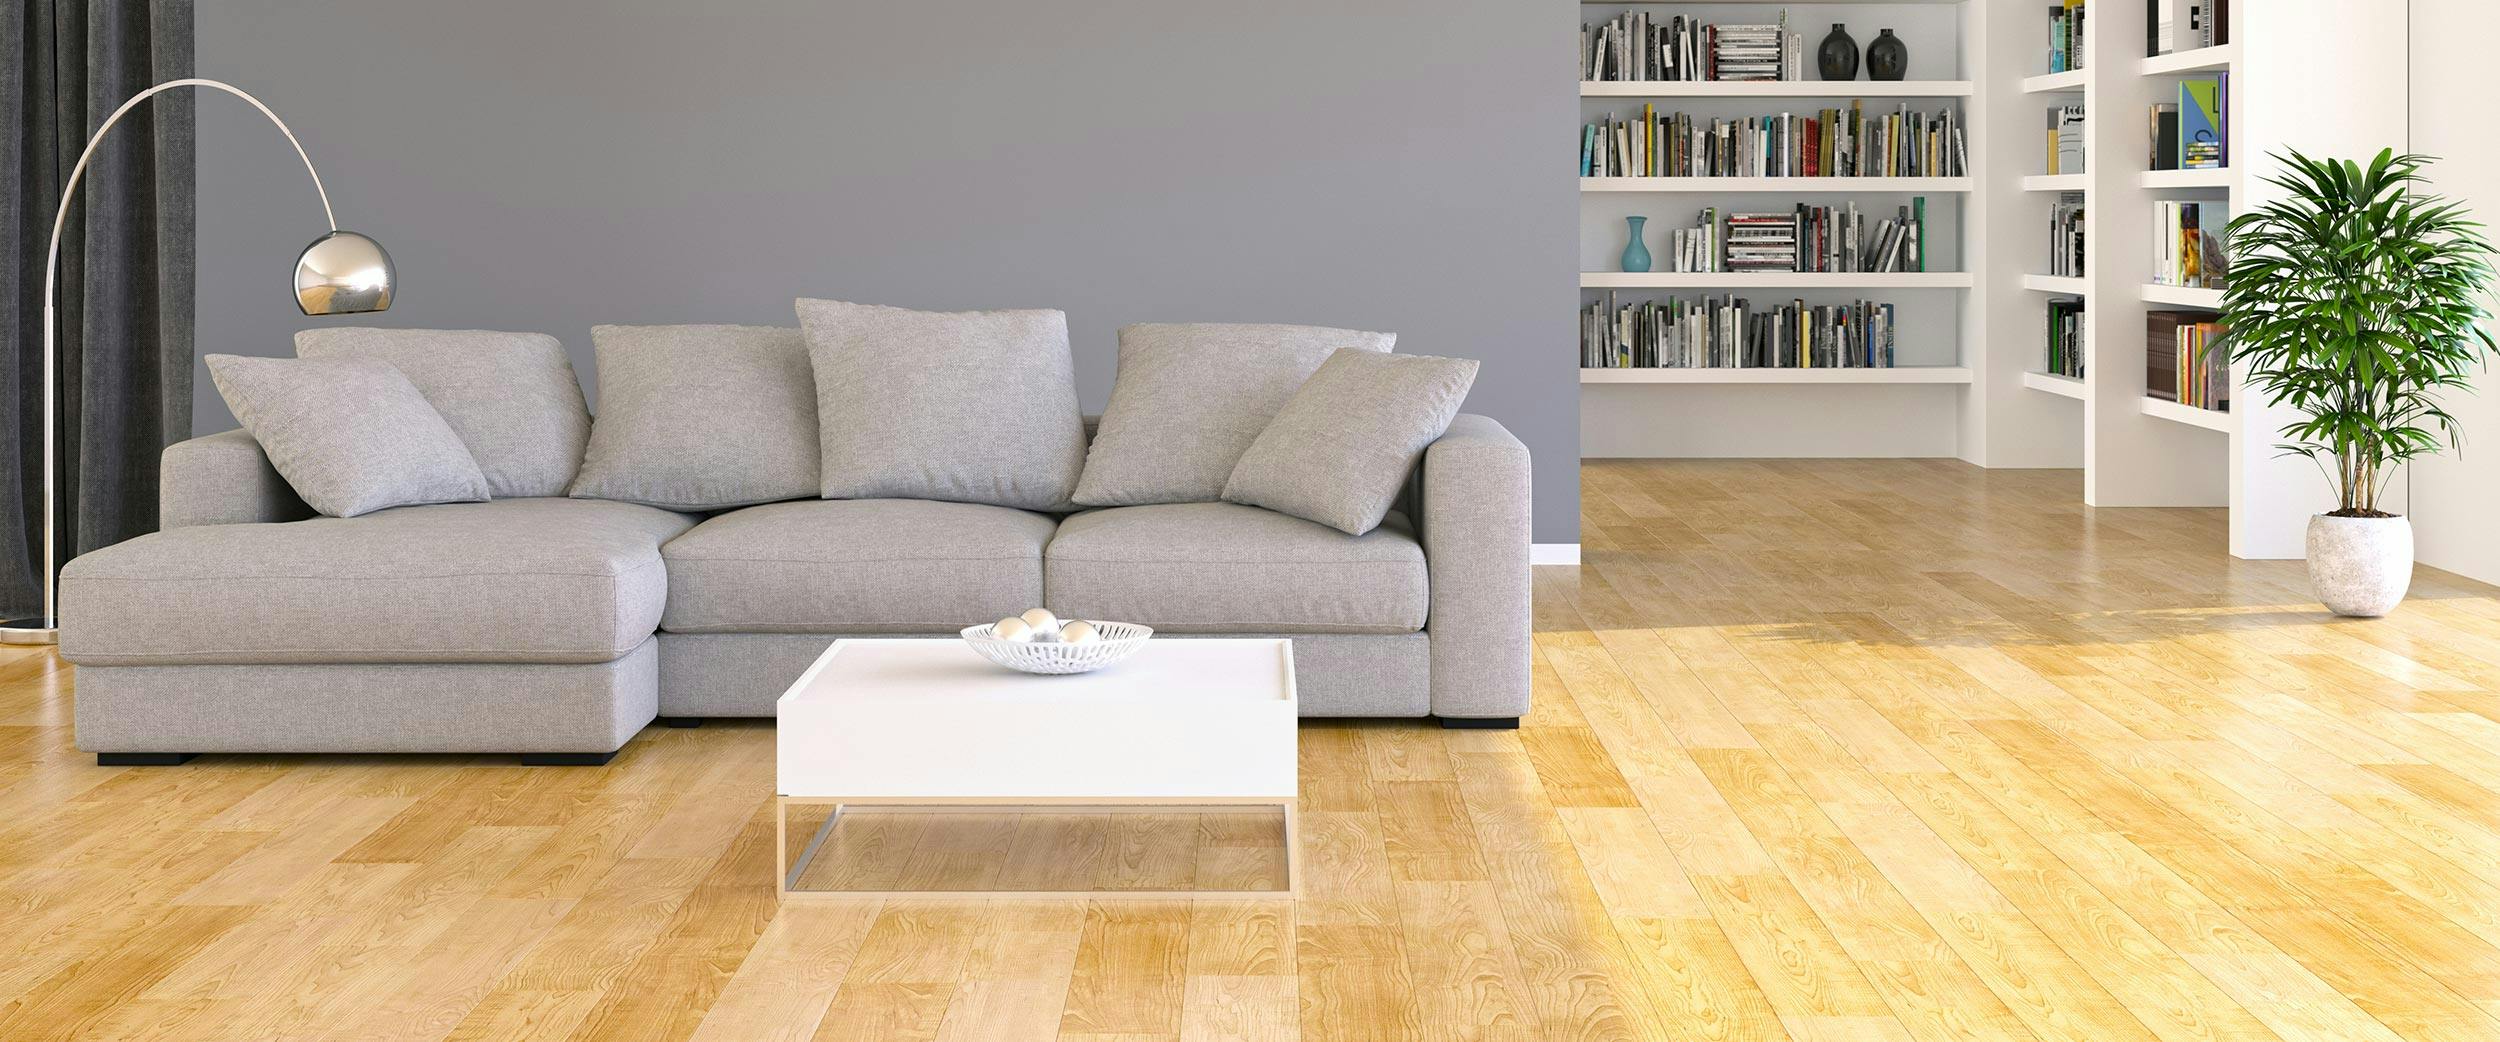
The hardwood floors in your rental property take a beating. Between tenant turnover (moved furniture), general wear and tear, and the presence of pets (if you allow them), it’s likely that after a few years of tenants, your once-sparkling floors are far from pristine and could probably use a touch up.
Most property owners think that to get that new-again sheen they have to sand down their floors, restain them, and reseal them. However, if the wear is fairly surface-level (normal wear, scratches in the finish and only a few deeper scratches that gouge that wood itself), it’s easy to refresh your hardwood floors in one day and save yourself from the mess, labor, and expense of sanding off your existing finish.
Pro tip: When you make the decision to touch up your floors yourself, it’s best to do it between tenants—that way, you’re not moving furniture in and out, nor are you forcing your residents to relocate for 48 hours. Read along to find out if this is the best way to renew or restore your floors.
Before you dive into any DIY home project, it’s important to know the materials you’re working with. This is especially important if you’re not the original owner. Different floor materials or treatments will have an impact on how you are able to refinish your floors, and you want to make sure you take the best and most effective approach.
Whether you have traditional hardwoods, prefinished wood, or laminated wood, restoring without sanding is a practical solution. Though you can sand your traditional hardwoods, it’s difficult or even impossible to sand prefinished or laminated wood floors. Why? Laminated floors (either glue-down or floating) only have a thin layer of attractive wood veneer over plywood, so you can’t sand these floors more than twice without damaging them and exposing the plywood.
As for traditional hardwoods, forgoing the sanding method saves you a lot of time, energy, and money (from tool rentals like sanders and a professional grade vacuum).
Unfortunately, if your floor has any kind of wax on it, the new finish won’t bond. Even if the floor
is worn, wax will remain in areas that have low foot traffic. Find a spot that doesn’t have a lot of wear, like a corner or behind a door, and drop some mineral spirits as a test. But what are mineral spirits? They’re actually a petroleum-derived clear liquid solvent you can get at a home improvement store.
After a few minutes, wipe the solution with a clean white rag. If the rag wipes clean, you’re all set. But if any brown or shiny residue comes off, you have wax. Chances are if your floor’s finish was applied before the 1970s (before polyurethane was used as a sealant), your floor is coated with wax, old-fashioned varnish, or shellac. If you do have wax, you still don’t have to sand it down for a clean and shiny finish. Consider buffing on a fresh wax coat to get that shine, albeit temporary, as well as to continue protecting your floors from wear and tear.
However, wax isn’t the only material to be wary of. Your floors could have residue from other household chemicals like furniture polish, glass cleaner, insecticide (from pest control professionals), wallpaper paste, paint, and other chemical cleaners that would prevent the adhesion for a new finish. Conduct a similar test with mineral spirits in a few other areas because you want to ensure your floor is in the best shape for adhesion before you get started.
Sometimes, going the sand-free method just isn’t going to work. As previously mentioned, if you have a wax-finished floor or find other chemicals that would prevent a few finish from bonding, you’d want to sand all of that off and start fresh.
Does the floor have many deep scratches and dents that penetrate the finish as well as the wood? What about high-traffic areas where the finish is completely worn away or flaking off? Your best bet is sanding so you can get the cleanest new finish. Though there’s no harm in adding a new finish to floors with this amount of wear because it will protect the floor, a new coat may accentuate existing deep gouges and won’t look flawless. Also, using the chemical etching process (more to come on this below) on bare wood will stain it.
In the case of water damage or pet stains that have penetrated through the finish to the actual flooring, a new coat of finish will not hide (or remove) these spots. The optimal way to remove these unsightly stains is through sanding.
This is the most effective way to make sure the finishes you plan on using will stick to the floor. The last thing you want to do is go through any type of process just to have your new finish flake or not bond properly, leading to a larger expense, more time spent, and a bigger clean-up. Save yourself the time in advance by truly checking to see if there’s anything going on with your floors that would prevent a new finish from working effectively. Tape off a small section and roughen up the floor with a sanding screen to test your refinishing materials. If it flakes by lightly scraping a coin against it or resembles a bumpy texture similar to an orange peel, sanding is the best route.
You can find this DIY kit at your local hardware or home improvement store (or online). A few brands might name their product differently, but they have the same process. You use a chemical solution to prepare the flooring and etch the old finish so the new finish will bond. Then you’ll apply a new coat of finish to restore your floor. The Rust-Oleum Transformations Floor Wood and Laminate Renewal Kit ($42) is a popular option. It’s best to follow the directions on the kit to ensure you’re doing it effectively, but read below to get a breakdown of what to expect from this kit compared to your other options.
Materials:
Pros:
Cons:
Make sure the floor is clear of any furniture. If the tenant moved out, hopefully that’s the case. Be sure to remove any partial furnishings or fixtures you provide that would get in the way of the floor (e.g. floor-length curtains, built-in shelves, etc.). Even if the tenant left belongings behind, follow the proper procedure to clear the space of their things. Also, take the doors off the hinges. This might seem like a pain, but closet and entry doors easily get in the way and prevent you from covering every spot on the floor evenly no matter how you move around them.
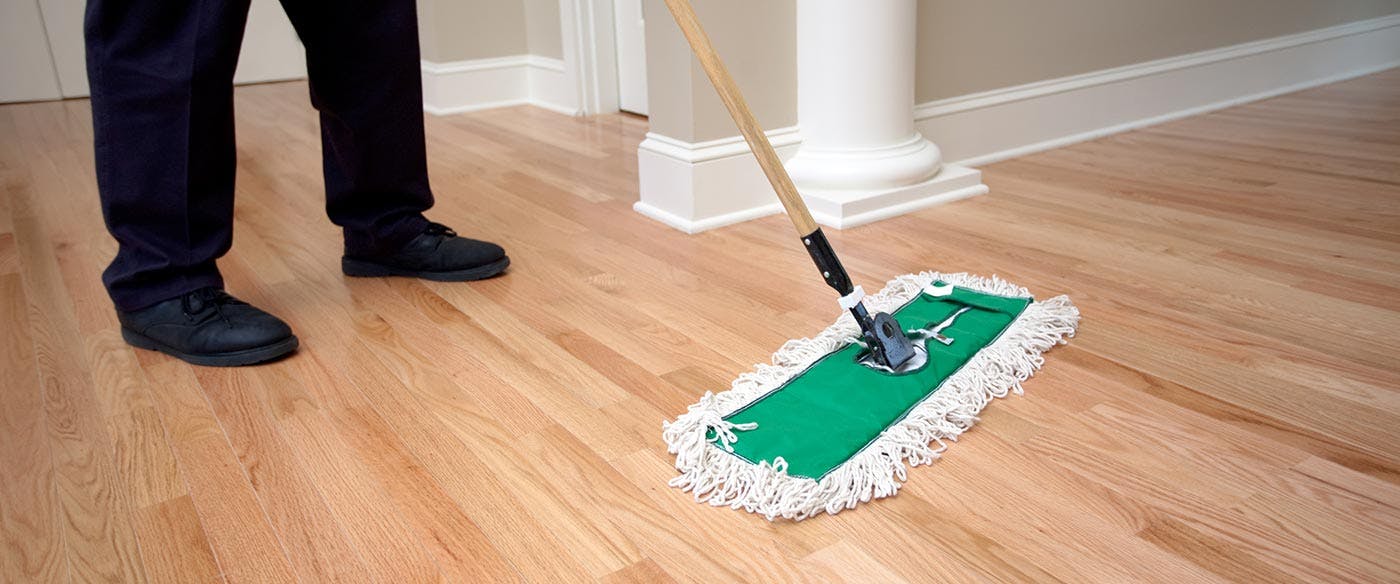
Also, clean the floor with a vacuum and damp cloth—no chemical cleaners. Ensure every surface in the room is clean from any dust and grime (window sills, blinds, curtains, and baseboards). You don’t want tiny particles to land on your floor in the wet finish and create imperfections when the finish hardens. If there’s gunk on the floor, use an abrasive sponge. Then let the floor dry after cleaning.
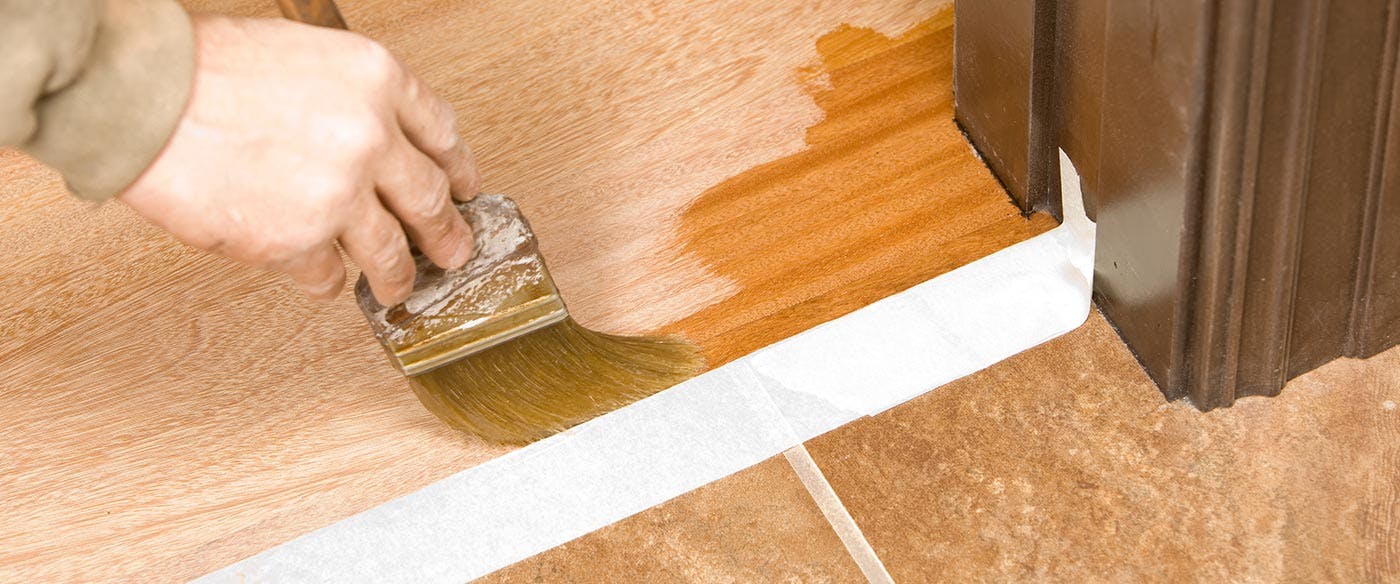
Prep the space by plugging any heating ducts or vents with old towels. Close windows and turn fans (or ventilation systems) off. You want to limit the spread of dust, which means stopping air flow. Use painter’s tape to protect your baseboards. Also, close the curtains or blinds to prevent sunlight coming through—you want to avoid creating hot spots on the floor that would cause the finish to dry faster than you’d want.
Using the abrasive pad included in the kit, scrub the liquid with the grain of the floor. You will have to attach the pad to the block and then screw in your own broom handle. If you don’t have a broom handle, you can do this on your knees—just be sure to wear protective clothing you don’t mind ruining. The Family Handyman recommends pouring the chemical abrasive into a plastic-lined shallow cardboard box (i.e. slip a shoebox into a garbage bag) instead of a painter’s tray so you can easily dip the pad, catch drips, and prevent spills. When coating the pad, press it to squeeze out any excess within the box.
Take it one small section at a time (4 ft x 4 ft) and apply a fair amount of pressure to roughen the floor’s surface. Don’t just mop—scrub firmly over each section a few times to get the most effective results. It’s important to go little by little because if the solution is left for for longer than five minutes on the floor, it can seep into the cracks between the flooring strips and damage the core beneath the laminate. As you go, wipe up any extra liquid with an old towel before starting the next area. However, the floor should not be dry (a thin film of liquid is ideal), just free of puddles.
Though the chemical etching liquid is fairly low-odor, if you want some ventilation, open a window or turn on a fan on low in a different room. However, this process shouldn’t take too long.
When the whole floor has been fully etched, allow it to dry for 30 minutes. In the meantime, take the abrasive pad off the block. You can throw out the pad, but rinse the block—you need this later to apply the finish.
Mix two tablespoons of dishwashing liquid into a gallon of warm water. Dampen mop to clean the floor and neutralize the etcher and clean up any remaining residue. Make sure the mop is only lightly damp as not to cause any water damage to the floor. Mop in small sections and clean up puddles as they form.
Wear shoe covers to keep the floor clean and free of any dust or particles. Then wait another 30 minutes for the floor to dry.
Use a tiny artist paintbrush or a cotton swab to apply some stain that matches the stain of the floor. Feather the stain out to make sure it blends in with the floor and then blot it with a rag. Dry the stain for a minute with a hair dryer and add a very thin coat of finish from the kit. Feather out the finish around the edges so there aren’t ridges you can see or feel. Then dry the patch with the hairdryer again.
First, plan out how you’ll apply the finish and recruit two helpers. The last thing you want to do is get backed into a corner or not have enough hands to complete the task. Make sure all of you are wearing shoe covers.
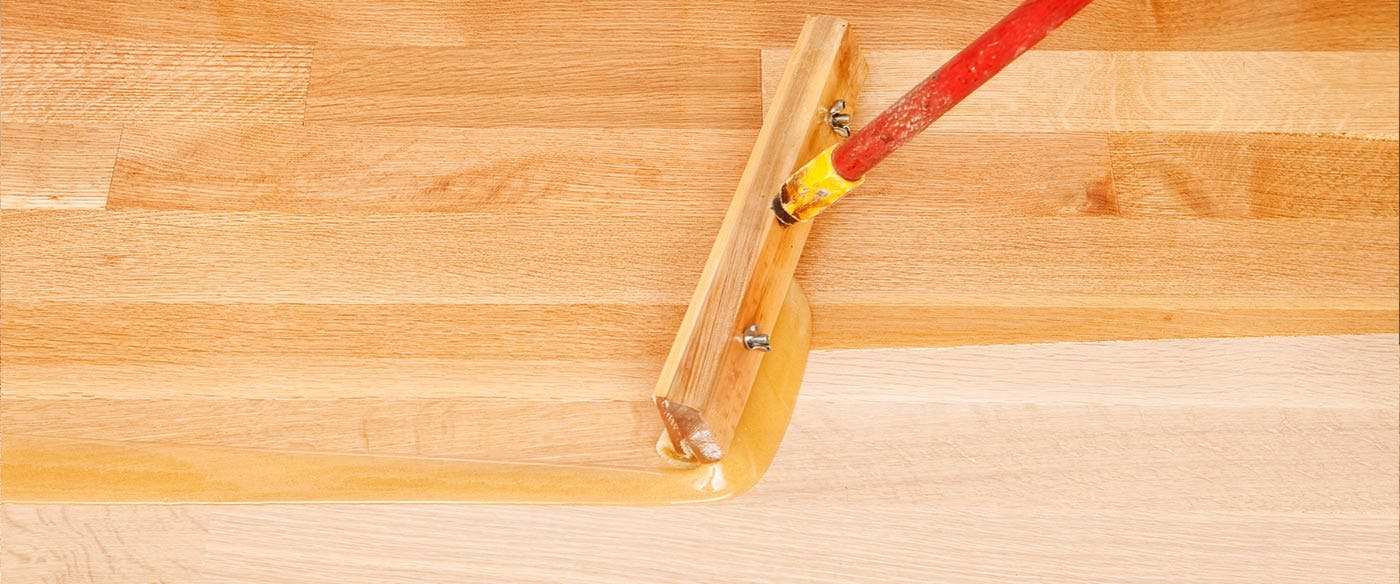
Put the finish applicator pad on the block and pour some finish into another plastic-lined box. This way you can get a good coating of finish on the applicator and in addition to minimizing drips. However, you don’t want to squeeze out the excess—this will create bubbles.
As you spread the finish on the floor, give your helper a head start coating the edges against the walls and baseboards with a paint pad and/or brush while you follow behind with the applicator.
Pro tip: Lightly moisten all of the tools you’re using to spread the finish so they’re more pliable. Rinse them with water and squeeze out until they’re barely damp to the touch.
To properly spread the new finish, work with the grain of the floor and gently pull the applicator at an angle so the excess finish continues spreading to the dry side of the floor. Have your other helper follow closely behind you to smooth out drips or puddles with a brush. You want to catch any extra finish before it dries. Evenly apply the finish in as few strokes as possible for the best results—a single steady pull should do. Keep the pad wet at all times because you don’t want the dreaded dry-brush look. Also, don’t stress about the milky and streaky color of the finish—it dries clear.
Depending on what finish your kit has, you have five to ten minutes, and possibly less, before the finish gets tacky and impossible to smooth out. If you spot any imperfections have the finish becomes sticky, leave them be—if you try to fix them at this point, you’ll do more harm than help. This is why planning your application strategy and having your equipment ready to go is essential. However, if you do notice a drip that’s going to leave a bump, let it dry and carefully remove it later with a razor blade.
In most cases, one coat of finish is enough to restore the finish. However, it’s a good idea to add a second coat for an extra layer to protect the underlying wood and hide the deeper scratches. Before adding a second coat, make sure you have enough finish to do another pass over the room. Note that the can should be at least half full. If not, run out to the hardware store to replenish your supplies—you have to wait a minimum of three hours before applying another coat anyway.
Follow the directions on the package for best results. However, after eight hours, you should be able to walk on the floor with clean socks. You can move furniture in after 24 hours. It’s recommended to let the finish fully set for two weeks before laying down an area rug. For this reason, give yourself a full two weeks before allowing tenants to move in. You don’t want them to put down a rug and mess up your hard work.
This approach is similar to using the chemical abrasion kit, but instead of using a liquid to rough up the floors, you’re using a buffer. Buffing is a little messier than using a chemical kit, and might look like sanding, but all you’re doing is roughing up the existing finish so the new finish will bond. You’re not fully sanding to entirely remove the finish and scratches, you’re just roughing it through screening. This is still a shallow solution to repair surface scratches and marks.
Materials:
Pros:
Cons:
This approach requires a tool you most likely don’t own. Head to your local home improvement store to rent a buffer. Make sure you plan out exactly when you want to restore your floors—the rental is the most expensive piece of this project and you don’t want to have it sitting around if you’re not ready to use it.
Are you surprised? Make sure the room is empty of furniture and the floors are free of any gunk and dust. Use a cleaner formulated for wood flooring and pay special attention to tough marks—maybe your tenant spilled something and didn’t properly clean it up. For these problem spots, use a scouring pad with mineral spirits. While you’re cleaning, take note of where there are any deep scratches, dents, or areas stripped of finish. If your floors have exposed nails (typically on older or rustic-designed properties), take note of where those are as well. Mark these kinds of spots with painter’s tape so you can tend to them when you’re done cleaning.
Return to the spots you marked. To make deeper scratches or areas where the finish is worn away less noticeable, they need to be doused with some mineral spirits to darken the spot a bit (this works for lightly colored floors). You can also take the approach from the chemical etching method where you can apply a little bit of stain that matches your floor’s color with a paintbrush or cotton swab. However, deep scratches are porous, so they’ll absorb more stain than you think. Aim a little lighter than your floor’s stain and then wipe away the access.
Pro tip: Use two colors of stain to match the grain of the floor—it adds some dimension to the scratch so the repair looks more natural.
For the high-traffic spots stripped of finish, you’ll need a bit more time. First wet the section with some mineral spirits to test how it would look with a coat of polyurethane. If it looks good, add a layer of polyurethane to seal it and let it set for two days before jumping into buffing.
Nails that stick out from the floor will get caught in the sanding screen and wreck the screen, and possibly even damage the buffer. Use a tool to hammer them into the floor. Either make them flush with the wood or sink them a little deeper. Once you’ve sunken the nails, fill in those spots and other deep gouges with some putty. Then, let the putty set.
With ridges, the buffer will go right through the finish to the wood and damage the stain. Panels many buckle in the presence of humidity. You might also find a ridge where one plank sits a little higher than the ones next to it or if they cup slightly. First stand on a ridge to see if you can level it. If that’s possible, secure it with a nail (and then sink it and seal it with putty). For ridges you can’t flatten, use a sanding screen to roughen them by hand and remember to avoid those areas with the buffer.
The buffer you rent won’t be able to get into the corners or right up against the baseboards, so you have to do these by hand—just remember to wear gloves. All you have to do is scratch up the current finish—you don’t want to wear it down or sand through it. Add a little bit of pressure and only go over the areas three or four times—that should be enough.
For this project, you need a few sanding screens. When your floor is clean and the edges are roughened, put a sanding screen under the buffer. You actually don’t attach the screen to the buffer—it says put under the weight of the machine.
Pro tip: When you go to rent the tool, ask for a brief tutorial at the improvement store. They’ll also tell you to lock the machine’s adjustable handle in place before you start using it.
You’re going to be creating a good amount of dust by buffing. Prepare the space by opening your windows and placing fans in them, closing ducts, and sealing off the working area. Cover all doorways to the affected room with sheeting, and seal the seams and slip opening entrances of the sheeting with duct tape. Make sure you wear a dust mask.
Before you even turn the buffer on, it’s important to know sanding screens usually wear out after 10-15 minutes of use. You want to check it every few minutes for a buildup of grit and remove any large pieces that will scratch the floor. Once a screen has worn out, flip it over or use a new one.
Begin with a fresh sanding screen. Turn on the buffer and swing it back and forth to properly buff the existing finish. Swing from wall to wall and work your way backwards across the room (same idea as not wanting to back yourself into a corner). Only buff each area one with one to two passes so you don’t eat through to the wood.
Thoroughly vacuum the room and wipe down the floors. Like you would for the chemical abrasive process, also clear curtains, blinds, window sills, and shelves of dust. You want there to be as little dust as possible to prevent it from settling in the wet finish.
Tape the baseboards so you won’t get any finish on those. As a DIY-er, polyurethane is the best finish option because it’s durable and easier to work with than the other alternatives. When you’re at the home improvement store, talk with an associate about the kind of polyurethane finish you plan on using: an oil-based urethane or water-based urethane.
Oil-based Urethane:
Water-based Urethane:
First, using a high quality paintbrush, start spreading your finish against the wall. When that’s complete, you’ll use an applicator pad on a block attached to a broom handle. Again, plan your application process so you don’t literally work yourself into a corner. As previously recommended, slip a shallow box into a garbage bag so you can pour the finish in and easily coat your applicator. This is sturdier than a paint tray. Coat the applicator and then drag the applicator at an angle while applying firm pressure to the floor. That way the finish will pool and you can spread it in the direction of the grain.
If your floors have the least amount of wear and you’re simply looking to renew them, pick up a revitalizer from your local home improvement store. Rejuvenate Floor Restorer and Protectant is a good option. A revitalizer restores tired and dull wood floors by filling in scratches and adding a glossy finish with a minimal amount of effort involved—not to mention the material protects your floors from everyday wear. If your budget is small, you have a limited amount of time, and you’re just looking to spruce up a place for prospective or incoming tenants, using a revitalizer is the way to go.
Materials:
Pros:
Cons:
Empty the room of furniture, take the doors off the hinges, clean the floor with a product specifically designed for hardwood floors, and ensure the floors are clean of dust and grime. This way, the revitalizer can really get into all the pores and scratches without particles in the way that might prevent it from bonding or give the floor a weird texture. Allow the floor to dry.
Follow the instructions on the package. For best results, make sure your floor is currently sealed with polyurethane. As we previously said, do you research on your current flooring materials before you go through any DIY sandless refinishing process to make sure you won’t waste your time. If you’re still not sure, test on a small spot to see how the revitalizer bonds to the floor. Just be aware that though the revitalizer is a milky white color, it will dry clear.
Before jumping in, tape the baseboards to protect them. Use a mop or similar kind of tool to evenly spread the material across the floor per the package’s directions. Make sure you get in the corners and up against the edges of the wall—you don’t want to have any inconsistent spots. Also, be sure not to leave any puddles.
Before you move back any furniture or allow people to walk on it, let the revitalizer dry. Most of these products dry within 45 minutes, but we recommend you wait a full 24 hours before laying down rugs, shifting furniture, or allowing foot traffic wearing anything more than socks.
When it comes to any DIY home renovation project, talk to people adept at refinishing floors. That might be the person at the hardware store, a contractor, a fellow property owner, or a friend. You know your floors best and can make the right decision for your property (as well as time, energy, and budget). Just be sure to time it right between tenants.